
Phoenix 3D Ground Scanner: Step-by-Step User Guide
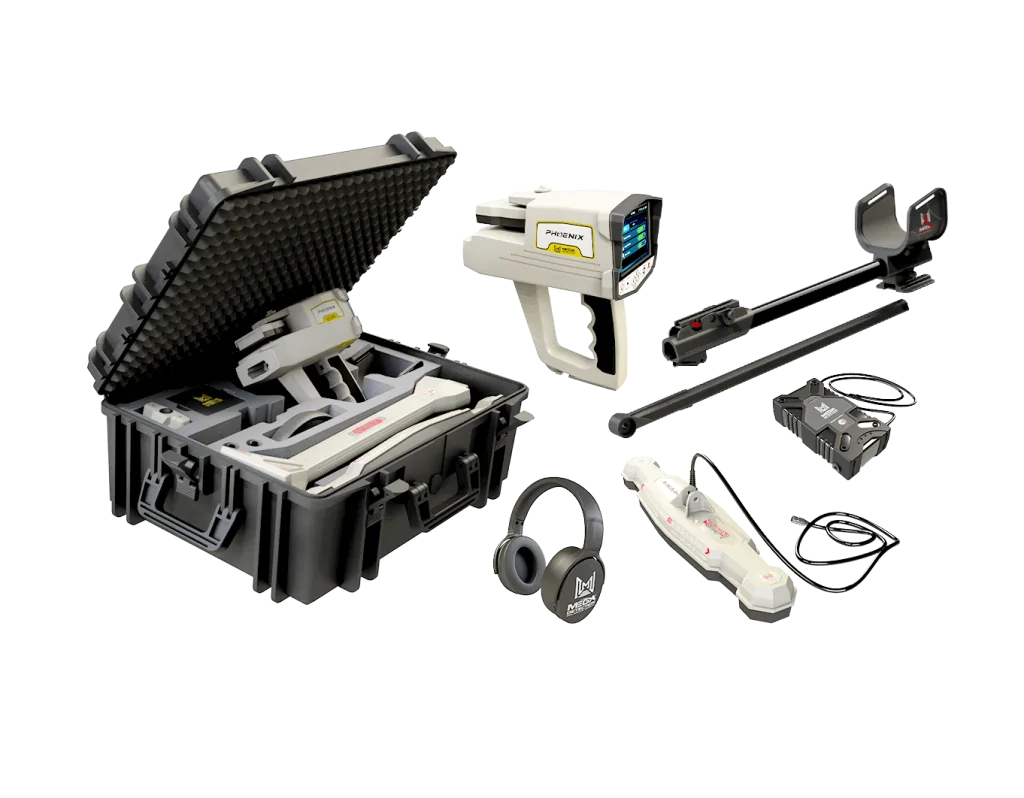
The Phoenix 3D Ground Scanner from Mega Detection is designed for users who need more than a conventional metal detector. It is built for ground scanning, treasure investigation, archaeological-style exploration, and cavity detection. According to Orient Detectors and Mega Detection product information, Phoenix includes three search systems: 3D Ground Scan, Live Stream, and Pin Pointer. It uses the M.G.S Multi Ground Scanner for structured 3D scans and the V.S.T Vertical High Signal Transceiver for live scanning and pinpointing.
This guide explains how to use the Phoenix 3D Ground Scanner in a practical step-by-step workflow. It is not a replacement for the official manual, but it helps users understand the logic behind the systems: when to use each mode, how to scan properly, how to read colors, and how to avoid false conclusions.
What Phoenix Is Designed to Do
Phoenix is a 3D ground scanner and multi-purpose metal detector for treasure hunting, archaeological excavation, and underground cavity detection such as tunnels and chambers. Its strength is visual ground analysis. It can display scan results on the device screen and, through the Multi Visual Analyzer app, on an Android tablet or smartphone.
The three systems serve different purposes:
| System | Sensor | Best Use |
|---|---|---|
| 3D Ground Scan | M.G.S 60 scanner | Structured grid scanning, 2D/3D results, target/cavity analysis |
| Live Stream | V.S.T probe | Real-time ground response and visual color stream |
| Pin Pointer | V.S.T probe | Accurate target or cavity location after detection or excavation |
Step 1: Choose the Right Mode Before Assembly
Phoenix uses different accessories depending on the mode. For Ground Scan, you use the M.G.S 60 scanner. For Live Stream and Pin Pointer, you use the V.S.T probe. Before assembling, decide what you are trying to do. If you want a mapped 3D scan of an area, choose Ground Scan. If you want real-time checking while moving over the ground, choose Live Stream. If you want to locate the exact center of a target or cavity, use Pin Pointer.

Step 2: Prepare the Search Area
Clean scanning starts before the device is turned on. Remove obvious surface metal if possible. Avoid scanning near vehicles, fences, power lines, large metal objects, and reinforced concrete. Mark the scan area with visible corners. If using Ground Scan, measure the area and decide the scan direction before starting.
Do not scan randomly and expect professional 3D results. A 3D scan needs a controlled grid. Poor walking creates poor images.
Step 3: Using 3D Ground Scan
The 3D Ground Scan system is the most important Phoenix mode for mapped underground analysis. It uses the M.G.S Multi Ground Scanner, which Mega Detection describes as a probe with a larger scan surface and multiple sensors for faster coverage and reliable results. Scan data can be displayed as 2D visualization on the Phoenix screen or 3D graphics in Multi Visual Analyzer.
Ground Scan workflow
- Assemble Phoenix with the M.G.S scanner.
- Connect scanner cable and battery correctly.
- Select Ground Scan from the menu.
- Choose whether results will be viewed on the device or tablet.
- Set scan width, height, step duration, and start point if using the app.
- Stand at the first scan line and keep movement steady.
- Move line by line according to the selected scan pattern.
- Save the scan and review it carefully.
Step 4: Understanding Phoenix Scan Colors
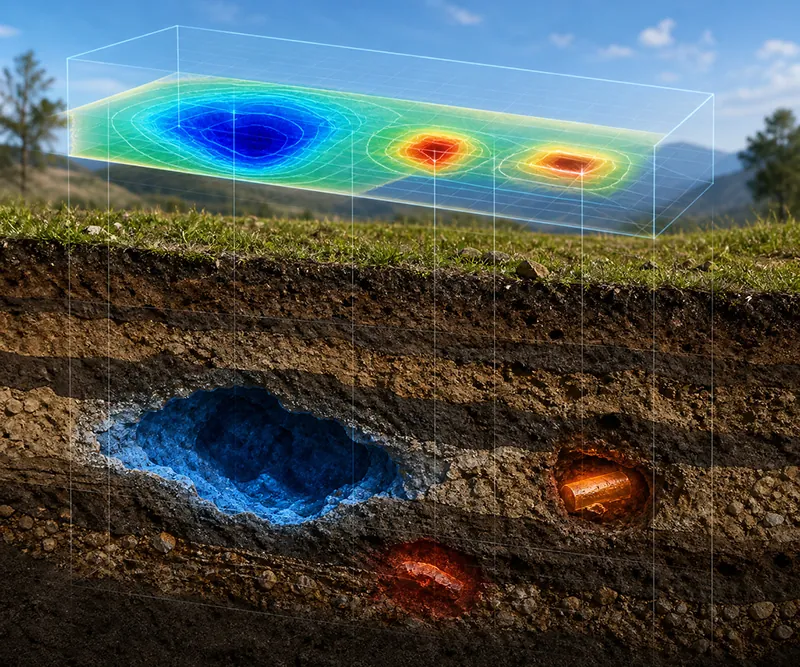
Orient Detectors lists the Phoenix color logic for Ground Scan as follows: green for normal ground, light blue for small cavity, blue for cavity, yellow for metal objects, and red for gold. Manual references also describe red, green, and blue percentage bars, average values, and depth values for selected cells.
| Color | General Meaning | How to Interpret |
|---|---|---|
| Green | Normal ground | Use as background comparison |
| Light Blue | Small cavity | Repeat scan and check shape |
| Blue | Larger cavity or void | Look for structure, direction, and repeatability |
| Yellow | Metal object | Confirm with Pin Pointer or another detector |
| Red | Gold or large metal target | Treat as a strong clue, not automatic proof |
Never interpret color alone. Shape, location, repeatability, depth, and scan quality matter. A red area near the edge of a bad scan is weaker evidence than a repeatable compact red anomaly in the center of a clean grid.
Step 5: Using Multi Visual Analyzer
Multi Visual Analyzer is the Android app used to display and analyze scan results. Manual references explain that the app can connect to Phoenix Wi-Fi, display Ground Scan results, open scanned files, show Live Stream, and adjust settings. It includes tools such as wireframe, data, grid, reset, filter, depth, soil type, and colors.
Use these tools carefully. Wireframe helps inspect shape. Data and depth help examine individual scan points. Grid helps separate points. Filter can remove unnecessary green background and leave stronger blue/red responses. Soil type should be selected properly because it affects depth values. Do not use filters to make weak data look dramatic; compare filtered and original views.
Step 6: Using Live Stream
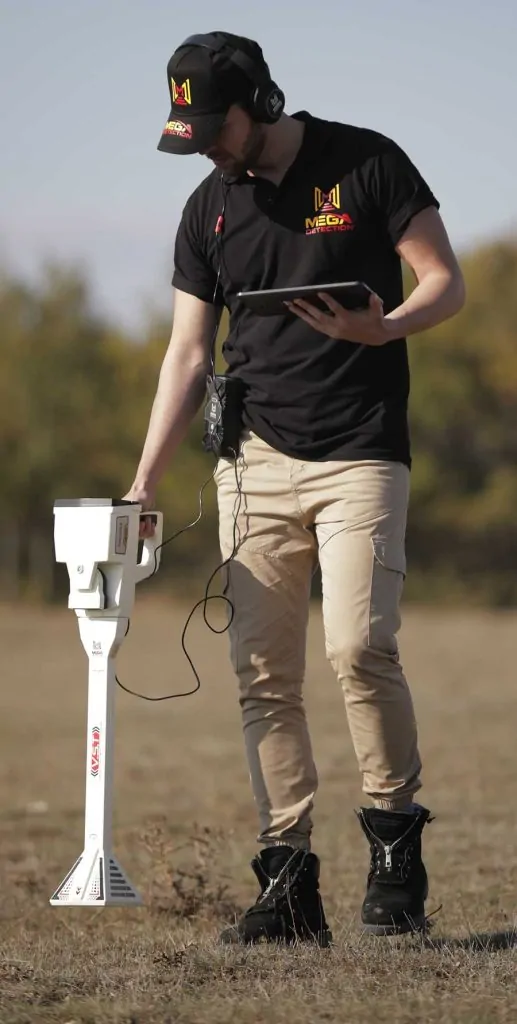
Live Stream uses the V.S.T probe for real-time scanning. Mega Detection describes it as a system that detects ferrous metal, non-ferrous metal, and cavities with direct visual representation on the screen or tablet. The V.S.T must remain vertical and perpendicular to the ground. It should not rotate, pivot, swing, or change height randomly.
Live Stream workflow
- Assemble Phoenix with the V.S.T probe.
- Select Live Stream from the menu.
- Calibrate the V.S.T probe as instructed.
- Hold the probe vertical and keep height constant.
- Move slowly over the ground.
- Watch color changes and numerical values.
- Adjust scan speed and sensitivity only when needed.
- Repeat suspicious areas from another direction.
In Live Stream, green generally represents natural ground, light blue small cavity, blue larger void or tunnel, yellow small metal object, and red gold or larger metal target. Again, colors are indicators, not final proof.
Step 7: Using Pin Pointer
Pin Pointer is used to determine the exact location of a metal target or cavity. It is useful after a scan has already identified a suspicious area, and it can also help after excavation. The system uses the V.S.T probe and displays audio or graphical response on the screen or tablet.
During Pin Pointer use, keep the V.S.T vertical, maintain constant height, and scan slowly. Manual references describe metal signals as graph rectangles above the center line, while cavity signals appear downward in dark blue. Sensitivity and calibration can be adjusted, but changes should be made carefully.
Step 8: Confirm Before Digging
A professional Phoenix workflow never ends with one colorful scan. Confirm suspicious results. Repeat the scan. Shift the grid. Scan from another direction. Use Live Stream over the same area. Use Pin Pointer to refine the location. Compare color, shape, depth, and repeatability.
Digging should be based on several pieces of evidence, not one red or blue patch. This is especially important in mineralized soil, rocky ground, disturbed soil, and old sites with mixed metal debris.
Common User Mistakes
Scanning without a grid
Ground Scan needs structure. Random walking produces unreliable 3D images.
Tilting the V.S.T probe
Live Stream and Pin Pointer require a vertical probe. Tilting creates false variation.
Changing sensor height
Keep height constant. Rising and falling creates artificial patterns.
Reading color without shape
Color is only one clue. Shape, depth, and repeatability matter more.
Overusing sensitivity
Too much sensitivity can increase noise. Use the highest stable setting, not the highest possible setting.
Field Checklist
- Correct sensor installed for selected system.
- Scan area measured and marked.
- Surface metal removed if possible.
- Probe height kept constant.
- Scan lines straight and evenly spaced.
- Soil type selected in app when analyzing depth.
- Results saved and reviewed from several views.
- Important anomalies repeated and confirmed.
How to Plan a Professional Phoenix Scan
A strong Phoenix scan begins with a plan. Before scanning, decide the purpose of the survey. Are you looking for a possible metal target, a burial chamber, a tunnel, an old cavity, or a general underground anomaly? The purpose affects the scan size, line spacing, sensor choice, and interpretation method. A wide area with no plan often creates confusing data. A smaller controlled survey usually produces more useful results.
For a first scan, choose a rectangular area that can be walked comfortably and consistently. Mark the four corners. If possible, use rope, chalk, stones, flags, or any simple visual markers. The operator should know exactly where each line begins and ends. If two people are available, one can operate the scanner while the other watches line direction and step timing.
Keep a notebook or phone note with the scan name, location, ground conditions, selected mode, sensor, soil type, scan dimensions, and any visible surface features. When several scans are saved, notes prevent confusion later. This is especially important when scanning archaeological-style sites, old structures, farms, or desert locations where the surface looks similar in every direction.
Reading 3D Ground Scan Results Like Evidence
The most important skill with the Phoenix 3D Ground Scanner is interpretation discipline. A scan result is not a final answer by itself. It is evidence. Good evidence has shape, position, repeatability, and logical depth. Weak evidence appears only once, appears near the edge, changes dramatically between scans, or depends on heavy filtering to look interesting.
When reviewing a 3D result in Multi Visual Analyzer, start with the original scan before using filters. Rotate the view. Look at the anomaly from above, from the side, and along the scan direction. A real object or cavity usually has some structure. It may be compact, elongated, or layered, but it should not look like random noise spread across the scan.
| Result Pattern | Possible Meaning | Next Step |
|---|---|---|
| Compact red/yellow anomaly | Possible metal concentration | Repeat scan and check with Pin Pointer |
| Long blue zone | Possible cavity, trench, or soil change | Scan from another direction |
| Random scattered colors | Poor scan technique or disturbed ground | Repeat with better grid control |
| Strong anomaly at scan edge | Incomplete target or edge distortion | Expand the grid beyond the anomaly |
| Same anomaly in repeated scans | More reliable evidence | Use Live Stream and Pin Pointer |
Using Soil Type and Depth Carefully
Depth values in any ground scanner should be treated as estimates affected by soil type, scan quality, target size, and mineralization. Multi Visual Analyzer includes soil type tools that help adjust analysis, but the user must choose realistically. Dry sandy soil, wet clay, rocky mineralized ground, and disturbed soil do not behave the same way.
If a result shows a depth value, compare it with the size and shape of the anomaly. A small isolated value at unrealistic depth may be less reliable than a consistent anomaly with reasonable depth across several cells. When possible, confirm by rescanning with a slightly shifted grid. If the same anomaly appears at a similar location and depth range, confidence increases.
When to Use Each Phoenix System in the Same Site
The best use of Phoenix is usually not one mode only. Use Ground Scan when you need a map. Use Live Stream when you want to check the surface response quickly or follow a suspected line. Use Pin Pointer when you already have a suspicious point and need a more exact center. Together, the three systems create a workflow.
- Start with Ground Scan to produce a structured image.
- Review the image and mark suspicious zones on the ground.
- Use Live Stream over the marked zones to see real-time response.
- Use Pin Pointer over the strongest point.
- Repeat the Ground Scan from another direction if the target is important.
- Only then decide whether excavation or further investigation is justified.
Practical Examples
Possible metal target
A compact yellow or red zone appears near the center of the scan. It is not stretched across the entire grid, and it repeats in a second scan. In this case, use Pin Pointer to locate the center. If the target is shallow, a standard metal detector can also help confirm whether metal is present.
Possible cavity or tunnel
A blue or light-blue shape appears as an elongated line. It repeats from another direction and aligns with visible surface features such as old stonework, soil depression, or a historic path. In this case, expand the scan area and check whether the anomaly continues. Avoid rushing into excavation because cavities require safety evaluation.
Poor scan technique
The image shows scattered red, yellow, and blue colors without structure. The operator remembers walking unevenly and changing sensor height. This is not a reliable result. The correct action is to repeat the scan with a smaller area, better line control, and constant sensor height.
Safety and Ethical Use
Ground scanners are often used around old sites, caves, buried structures, and historical locations. Always follow local laws and obtain permission before scanning or digging. Avoid unsafe excavation, especially where a cavity or tunnel may be present. A scanner can suggest an underground feature, but it cannot guarantee structural safety. Work carefully and involve qualified support when a deep void or old structure is suspected.
FAQ
What are the Phoenix search systems?
Phoenix includes 3D Ground Scan, Live Stream, and Pin Pointer systems.
What is M.G.S used for?
M.G.S, or Multi Ground Scanner, is used for structured 3D Ground Scan surveys.
What is V.S.T used for?
V.S.T, or Vertical High Signal Transceiver, is used for Live Stream and Pin Pointer modes.
Can Phoenix identify gold with certainty?
It can show gold-related or metal-related color indications, but results should be confirmed with repeat scans and other systems before excavation.
Final Advice
The Phoenix 3D Ground Scanner is strongest when used methodically. Prepare the ground, choose the correct system, scan with discipline, read colors carefully, and confirm important results. Treat the app as an analysis tool, not a treasure guarantee. With clean technique, Phoenix can become a powerful tool for scanning treasures, cavities, tunnels, and underground anomalies.