

How to Prospect for Natural Gold Using a Metal Detector
Successful gold prospecting with a metal detector starts with a credible site, stable detector operation, and controlled coverage. Research a gold-bearing area where detecting is permitted, choose a coil suited to the terrain, complete the detector’s ground-balancing procedure, and search a defined area methodically. Investigate plausible signals, record recoveries accurately, and use the evidence to plan the next search.
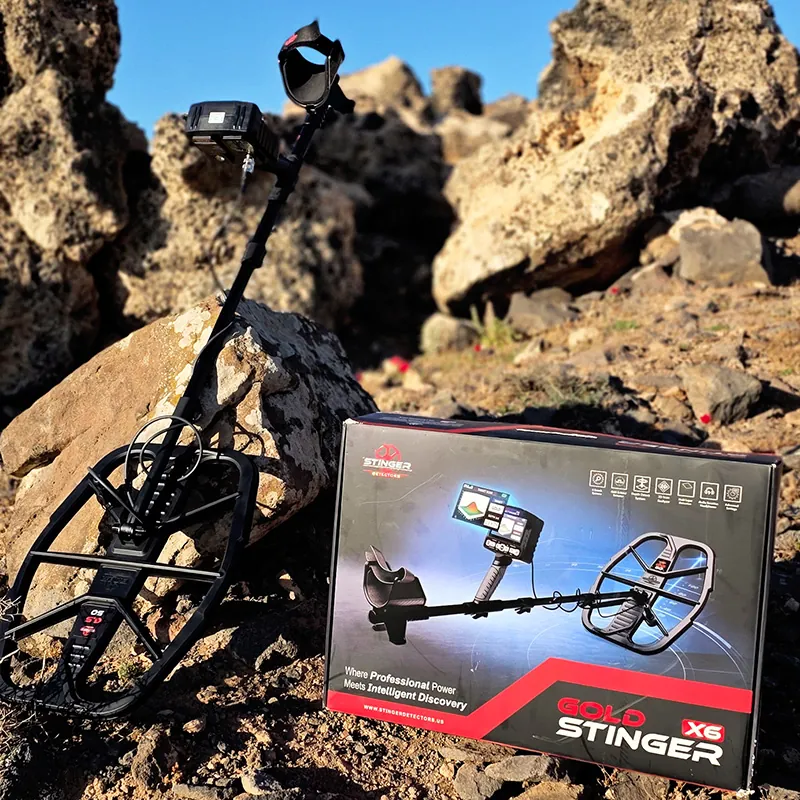
The detector is only one part of that process. A powerful machine cannot compensate for searching unsuitable ground, lifting the coil at the end of every sweep, or failing to record where a nugget was recovered. Equally, careful technique cannot make a detector identify gold that is too small, too deep, or otherwise beyond its capabilities.
This guide explains how to prospect for natural gold using a metal detector through eight connected tasks: site selection, sweep technique, ground balance, coil choice, mineralized-soil management, patch detecting, find recording, and a repeatable field procedure. The aim is to help you make better decisions outdoors, rather than promise a find or prescribe one setting for every machine.
1. Gold Prospecting with a Metal Detector: Site Selection
Begin with evidence of gold, not appearance alone
Start by identifying a district with documented gold occurrences. Geological maps, mining reports, historical production records, and reliable local information provide a stronger starting point than an attractive-looking creek. Check whether records describe coarse gold, fine placer gold, or gold dispersed through rock: those are different detecting opportunities.
A site that produces fine gold in a pan does not automatically contain nuggets large enough for your detector to hear. Likewise, a mapped gold occurrence may lie beneath cover that makes it inaccessible to a handheld machine. Your first question is whether recoverable targets of a detectable form are reasonably plausible within the accessible surface material.
Distinguish primary and secondary deposits. Gold may occur within its original host rock or be released by weathering and concentrated in sediments. The USGS explanation of gold deposits describes these as lode and placer deposits. That distinction helps frame your search: exposed mineralized rock presents different questions from a shallow accumulation of transported gravel.
Compare promising ground features
Within a documented gold-bearing area, examine exposed bedrock, shallow gravel, erosion surfaces, and material associated with past workings. Stream processes can concentrate gold near bedrock and in natural traps, but the presence of a bend, crack, or boulder does not establish a deposit. Use these features to prioritize investigation rather than declare a location productive.
Quartz, iron-stained rock, and black sand can provide geological context. They are not individual proof of gold. Look for a combination of evidence: a relevant documented occurrence, a plausible transport or weathering process, accessible ground, and recoveries that can be checked.
| Site question | Useful evidence | Reason to reconsider |
|---|---|---|
| Has gold been recorded locally? | Geological reports and documented workings | Only an unsourced rumor or a promotional video |
| Was the gold coarse enough to detect? | Credible records of nuggets or relevant specimens | Only finely dispersed or microscopic gold is described |
| Can the coil reach useful ground? | Accessible bedrock, shallow cover, or workable surfaces | Deep overburden or obstructions prevent a meaningful search |
| Can you search the area lawfully? | Confirmed access and applicable detecting permissions | Unresolved ownership, claims, or restrictions |
| Can the search be recorded and repeated? | Recognizable boundaries and a workable survey plan | No way to distinguish searched from unsearched ground |
Check access before making a field plan
Research the ownership, land status, mineral rights or claims where relevant, and the rules governing detecting and disturbance. Permission to walk on land does not necessarily include permission to prospect, remove material, or excavate. Requirements depend on the location and activity, so verify them with the responsible authority and rights holder.
Observe old workings from safe ground; do not enter shafts or unstable excavations. Plan water, weather protection, navigation, communication, and a return arrangement appropriate to the site. These preparations help you maintain a controlled search rather than cut it short or rush the last part of a field day.
2. Prepare the Detector and Choose the Right Coil
Match the machine to the job
For gold prospecting with a metal detector, useful sensitivity must be considered together with ground handling. A detector that responds strongly to a small sample indoors may be difficult to interpret on mineralized ground. Compare the complete configuration in relevant conditions.
Gold-focused VLF or simultaneous multi-frequency detectors and dedicated pulse induction machines offer different controls and tradeoffs. If you are still choosing equipment, use our gold detector buying guide. This field article concentrates on using the equipment once you have a suitable configuration.
Examples in the gold nugget detectors category include Gold Monster 2000, GPX 6000, and Garrett Axiom. Explore the Minelab gold detectors and Garrett prospecting detectors ranges for package comparisons. These are equipment examples, not a measured ranking or a guarantee of local performance.

Choose coil size for terrain and target access
A smaller coil can be easier to place among rocks and shrubs and may help isolate nearby responses. A larger coil covers a wider path and may be useful for certain larger targets, but it can be awkward on broken ground. Actual sensitivity and stability depend on the detector, coil design, settings, and soil.
Choose for the surface you can realistically follow. If a large coil forces you to hover above a rocky slope, its extra diameter may not translate into better practical coverage. A compact coil that reaches gaps and stays controlled can be the more useful working tool there.
Coil shape matters as well. Consider whether the toe can reach a narrow gap and whether the footprint fits the spaces between obstacles. Check the weight of the fully assembled setup before planning several hours of searching.
Confirm coil type and compatibility
Mono and DD describe different coil arrangements, and their suitability is model-specific. Do not assume that any coil of a given diameter will fit or that all coils support the same ground-management functions. Consult the exact detector manual and compatibility information before changing equipment.
For example, the GPX 6000 manual distinguishes mono coils from its DD coil and documents different noise-management uses. That is a model-specific example, not a rule to transfer to every PI detector. Package contents can also vary by region.
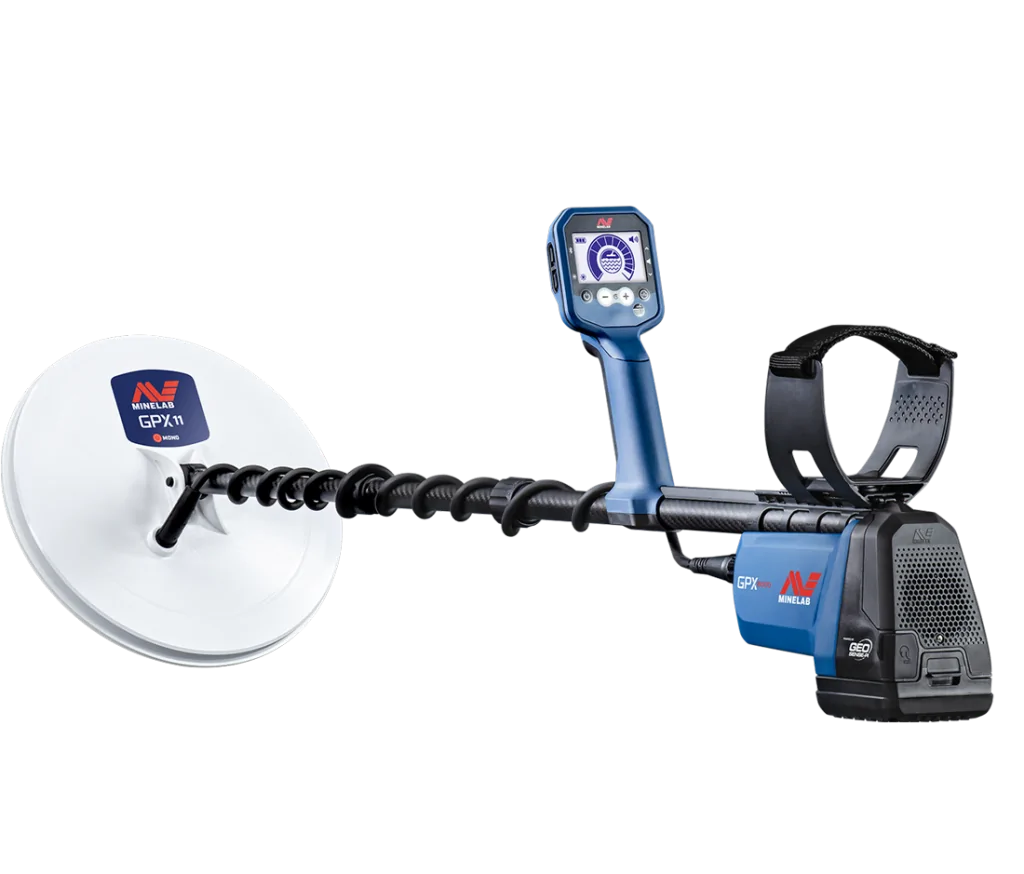
If you carry a second coil, decide beforehand what problem it is intended to solve. A smaller coil might allow closer coverage around obstacles; a different supported coil may suit a ground condition. Change one major variable at a time and record why you changed it.
3. Ground Balance Before Judging Weak Signals
Understand what ground balance does
Ground balance reduces the detector’s response to the local ground so that target responses can be easier to recognize. It does not tune the machine exclusively to gold, prove a target’s identity, or remove every effect of mineralization.
Automatic, manual, and tracking systems involve different procedures. Some machines continuously adapt; others require the operator to initiate an adjustment. Follow your model’s sequence rather than applying another detector’s button presses, pumping height, or numerical setting.
For more background, read our metal detector ground balance guide. The field objective is simple: establish usable operation over ordinary ground before deciding whether a subtle response deserves investigation.
Use a clean reference area and separate setup tasks
- Inspect the assembly. Check externally accessible connectors, cable routing, shaft security, and coil attachment according to the manual.
- Reduce nearby metal influence. Keep recovery tools and loose metal away from the coil while evaluating the ground.
- Choose reference ground. Find a nearby area without an obvious localized target response.
- Follow the startup and interference procedure. Noise cancellation and ground balance address different sources of disturbance.
- Complete the model’s ground-balancing procedure. Then sweep normally over the reference area to assess the result.
- Check a known sample where permitted. Use it as a repeatable operating check, not a measurement of achievable burial depth.
A small test sample is easy to lose. Secure it in a clearly identified nonmetallic container, keep it separate from recovered finds, and confirm that it is back in your kit after the check. Its purpose is to help you compare operation before and after a change.
Reassess when the ground changes
If moving onto different material changes the background response, pause and assess it rather than compensating with faster sweeping. Follow the manual’s approach to rebalancing, ground modes, and sensitivity. For GPX 6000 specifically, Minelab documents continuous tracking and an operator-initiated Quick-Trak procedure for changing ground.
Avoid repeatedly balancing directly over an unresolved localized response. Move to suitable reference ground for adjustment, then return to investigate. Whether tracking should remain active during detailed checking depends on the machine and its instructions.
4. Sweep Technique for Gold Prospecting with a Metal Detector
Control height and keep the coil level
Follow the ground contour while keeping the coil at a controlled working height appropriate to the detector and surface. Avoid lifting it sharply at each end of the arc. This common pendulum motion changes the distance to the ground and leaves the outer parts of the search poorly covered.
Do not sacrifice control to force the coil into every gap. Bumping rocks, striking vegetation, or pulling on the cable can complicate signal assessment. Where an obstacle prevents a full pass, approach from another safe direction and record any area you could not cover.
Match sweep speed to the response
There is no single number of seconds per swing that suits every detector, coil, mode, and target. Use the manufacturer’s guidance, then test whether your chosen pace produces a recognizable response over a relevant sample. An excessively slow movement is not automatically better on a motion-dependent detector.
Keep your walking pace compatible with your coil movement. If you advance too far between sweeps, gaps remain even when the sideways motion looks careful. Fatigue can make your steps longer, your arc less level, and your attention less consistent; pause before that becomes your normal technique.
Our sweep speed and coil height guide explains these relationships in more detail. In the field, concentrate on a controlled path and a signal you can interpret rather than a universal speed target.
Overlap passes and define search lanes
Do not assume that the coil detects every target equally across its entire physical width. Overlap adjacent passes and shorten your forward steps where targets may be weak or access is uneven. The appropriate overlap depends on the configuration and conditions, so avoid treating a fixed percentage as a guarantee.
Select visible start and finish references for each lane. Use temporary markers only where permitted, and remove them afterward. Complete a manageable block before moving to another feature so that your notes describe actual coverage.
A second pass across a block from another direction can reveal responses affected by the original approach or incomplete access. It improves your investigation; it does not certify that the area is exhausted.
5. Work Mineralized Soil and Hot Rocks Methodically
Mineralized soil, individual hot rocks, conductive salt, electrical interference, nearby metal, and physical contact can all complicate the audio. More than one may be present. A noisy detector does not by itself identify the cause.
For gold prospecting with a metal detector, the goal is usable target recognition rather than the highest available sensitivity. If the background obscures a weak response, pause on reference ground and make a controlled adjustment. Record the change so that you can reverse it or compare the result.
| Observation | Useful next check | What it does not establish |
|---|---|---|
| Noise across a broad area | Assess reference ground, interference controls, and the model’s ground settings | That all noise is mineralization |
| Response at one small location | Mark it and repeat controlled passes from different directions | That the target is gold |
| Signal associated with a loose rock | Where allowed, check the rock separately and rescan the original spot | That there is no separate target beneath it |
| Noise after a bump or cable movement | Repeat without contact and inspect the external setup | That the detector necessarily needs repair |
| Background changes with a new surface layer | Compare on reference ground and follow the appropriate setup procedure | That the new layer contains gold |
Some target responses change with direction or become clearer after permitted shallow disturbance. Others remain uncertain. Treat repeatability as a reason to investigate, not a material-identification test. Do not reject an entire type of signal just because one similar response proved to be a hot rock.
A strong discrimination setting can suppress unwanted responses, but gold can overlap rejected categories. Use the exact model’s identification tools cautiously. Neither a high tone, a low tone, a target number, nor a gold-probability indication provides an assay.
6. Investigate Signals and Recover Targets Carefully
Locate the response before disturbing the ground
Stop advancing when you hear a plausible response. Mark its approximate location and repeat shorter, controlled sweeps. Approach from another direction where possible. Reduce the size of the search area until you have a practical place to investigate.
Keep the coil movement consistent while comparing passes. Changing height, speed, and direction simultaneously makes it harder to understand why a response changed. Place your digging tool well away from the coil before rechecking.
Separate the original spot from removed material
Where disturbance is permitted, remove material carefully in small stages and place it on a clean, separate surface. Recheck the original location and the removed material independently. This tells you where the detectable response now lies without assuming what caused it.
A nonmetallic scoop can help divide loose material into smaller portions. Check an empty scoop first and keep your hands clear of unknown sharp objects. Rings, watches, tools, and other metal near the coil can complicate recovery checks.
If a small target seems to disappear, stop enlarging the hole automatically. Recheck your reference response, the edges, the spoil, and the nearby surface with controlled movements. The object may have shifted, or the earlier response may have another explanation.
Confirm the recovery and rescan
Once an object is isolated, document what you actually recovered. A detector response cannot prove that a yellow object or a mineralized specimen contains gold. Record uncertain identification honestly and arrange appropriate examination or analysis if it matters.
Rescan both the recovery spot and the removed material before closing the hole. A second response may be a separate object or residual material requiring assessment. Refill and restore the area as required, remove recovered rubbish, and take away all temporary markers.
7. Detecting Patches: What to Do After Finding Gold
Treat the first find as a new search reference
A detecting patch is an area containing a grouping of recoverable targets. One confirmed piece is a reason to examine the surroundings more carefully, but it does not establish the size, direction, or value of a deposit.
Record the recovery position before walking away. Mark a small search block around it, then complete controlled coverage within that block. Expand in stages so that each extension has a recognizable boundary and a recorded result.
Do not assume the next nugget must lie uphill, downhill, or along a straight line. Transport, erosion, terrain, and previous disturbance can create different distributions. Test directions systematically and let additional verified finds strengthen or weaken your working explanation.
Separate reconnaissance from detailed patch searching
Reconnaissance tests whether a wider area merits more attention. Detailed patch searching concentrates effort within a promising block. Record which method you used: a quick walk across a slope should not later appear on your map as complete coverage.
On a promising patch, reduce the size of the block rather than rush to cover a large area. Revisit obstructed edges, change your approach direction, and check material around each recovery. If you change coil or settings, note which blocks were searched under each configuration.
A second coil is useful when it answers a specific access or response question. It is not proof that all remaining targets will be recovered. Similarly, an additional pass can improve coverage without establishing that the patch is “cleaned out.”
Use an explicit boundary rule
For example, after a confirmed find, divide the immediate area into manageable blocks and search each in a documented order. If another find occurs, add adjacent blocks to the plan. If repeated blocks produce no verified gold, review the geology, search quality, and time available before extending again.
This is a suggested planning method, not a geological formula. No fixed radius or number of empty blocks proves that a deposit ends. The benefit is that you can explain what you searched, why you expanded, and where the next visit should begin.
8. Record Finds, Coverage, and Negative Results
Good records make gold prospecting with a metal detector more informative. They connect recoveries to the conditions and effort that produced them. Without that context, a map of finds can exaggerate an area searched intensively and overlook a promising area that received only a short visit.
Give every find a unique reference, then use the same reference in your notebook, photographs, and sample container. Save coordinates with the coordinate system or map datum and any accuracy estimate available. For a small patch, add a local sketch with distances and recognizable features because a GPS point alone may not relocate an exact recovery spot.
| Field | What to enter |
|---|---|
| Date, site, and block | Session date, site reference, and the block or lane searched |
| Find ID and position | Unique reference, coordinates, positioning accuracy, and sketch reference |
| Equipment | Detector, coil, mode, and important settings or changes |
| Ground and access | Surface material, moisture, obstructions, and ground-response notes |
| Response and recovery | Observed signal, recovered object, and identification confidence |
| Depth | Measured recovery depth with a stated reference, or clearly labeled estimate |
| Find details | Photographs, dimensions, mass if measured, and container label |
| Search effort | Time, lane direction, coverage quality, and unfinished areas |
| Next action | Adjacent block, repeat pass, equipment question, or reason to move |
Distinguish observations from interpretations. “One recovered yellow metal piece, identification pending” is an observation. “A rich gold lead continues uphill” is a hypothesis that requires evidence. Keep them in separate fields.
Record negative results too. An empty search is most informative when you know the area, effort, setup, and coverage quality. “No gold recovered from two completed lanes” is more useful than “nothing there.” It also prevents later visits from repeating an unrecorded search unnecessarily.
Keep location records private where appropriate and respect any confidentiality agreed with the rights holder. Back up the day’s notes and photographs before relying on them for the next trip.
9. Gold Prospecting with a Metal Detector: Complete Field Procedure
Use this sequence as a working checklist and adapt it to the detector manual, access conditions, and local requirements. It combines preparation, searching, recovery, and review into one repeatable routine.
- Research the district. Identify credible gold records and whether detectable natural targets are plausible.
- Confirm access and plan the visit. Check permissions, restrictions, route, weather, communication, and return arrangements.
- Walk the proposed block. Note terrain, obstacles, old disturbance, and areas that cannot be searched safely or lawfully.
- Define the objective. Choose reconnaissance or detailed patch searching and mark the coverage boundaries in your notes.
- Prepare the configuration. Fit the compatible coil, inspect the assembly, and organize tools away from the coil path.
- Establish a reference. Follow the startup, noise-management, and ground-balancing procedures on suitable ground.
- Check operation. Confirm a recognizable response from your secured sample if used, then retrieve the sample.
- Search controlled lanes. Maintain a level coil path, suitable pace, and overlapping coverage.
- Investigate plausible signals. Repeat the response, localize it, and recover only where permitted.
- Document and rescan. Record the recovery, check the hole and spoil, and restore the surface.
- Adjust the plan using evidence. Expand around verified finds or reassess an unproductive block without inventing certainty.
- Close the session. Mark unfinished areas, remove equipment and markers, back up records, and plan a specific next step.
Review the session against the procedure rather than only the weight recovered. Did the detector remain usable? Were the lanes actually completed? Were uncertain signals assessed consistently? Can you relocate each find and explain the next search? Those questions reveal improvements you can make even after a day without gold.
Common Field Mistakes to Avoid
- Choosing ground only because it looks promising. Combine visible features with credible geological or recovery evidence.
- Searching without boundaries. Define blocks so that your coverage can be checked.
- Using maximum sensitivity despite unreadable audio. Prioritize a response you can interpret.
- Lifting the coil or taking long forward steps. Watch both the coil path and walking pace.
- Applying universal settings. Follow the exact detector and coil instructions.
- Assuming a tone proves gold. Verify by recovery and appropriate identification.
- Changing several variables together. Make controlled comparisons and record each significant change.
- Leaving after the first find without recording it. Establish the location before expanding the search.
- Declaring a patch exhausted. Describe completed coverage and remaining limits instead.
Frequently Asked Questions About Natural Gold Prospecting
Where should a beginner start gold prospecting with a metal detector?
Start in an accessible area with credible records of detectable natural gold and confirmed permission to prospect. Choose a manageable search block and learn your detector over representative ground before attempting a large or remote search.
Can a metal detector find fine gold flakes?
Very fine or dispersed gold can be beyond a detector’s capabilities. Detectability depends on the target, configuration, and ground. A location that yields fine gold by panning does not automatically offer suitable detector targets.
How often should I ground balance?
Follow your model’s instructions. Reassess when the ground response changes or you move to different material, and use the documented tracking or adjustment method. A fixed interval is less useful than understanding the machine and the changing ground.
What is the best sweep speed for finding nuggets?
Use a controlled pace suited to your detector, coil, and mode. Check a relevant sample and follow the manual. Avoid a universal seconds-per-swing rule and keep your forward steps short enough to maintain coverage.
Should I use a small or large coil?
Choose a compatible coil that can follow the terrain and serve your main target. Smaller coils may improve access and isolation; larger coils may help coverage and certain larger targets. Neither is always the better choice.
Does black sand mean there is gold?
No. It can provide context in a gold-bearing environment, but it is not proof of a detectable gold target. Combine geological evidence, site assessment, and verified recoveries.
What should I do immediately after finding a nugget?
Record the recovery position, identify and label the find, rescan the immediate area, and define a small block for detailed coverage. Expand systematically rather than assuming a deposit direction from one piece.
Can I identify gold by its detector sound?
No single tone or response establishes gold. Other objects and ground effects can produce similar indications. Use the signal to guide investigation and confirm identity through the recovered object and appropriate examination.
What should I record after a day without finds?
Record where you searched, how thoroughly, for how long, and with which configuration. Include noise problems and unfinished ground. A documented negative result can improve the next search; an unrecorded walk provides much less information.