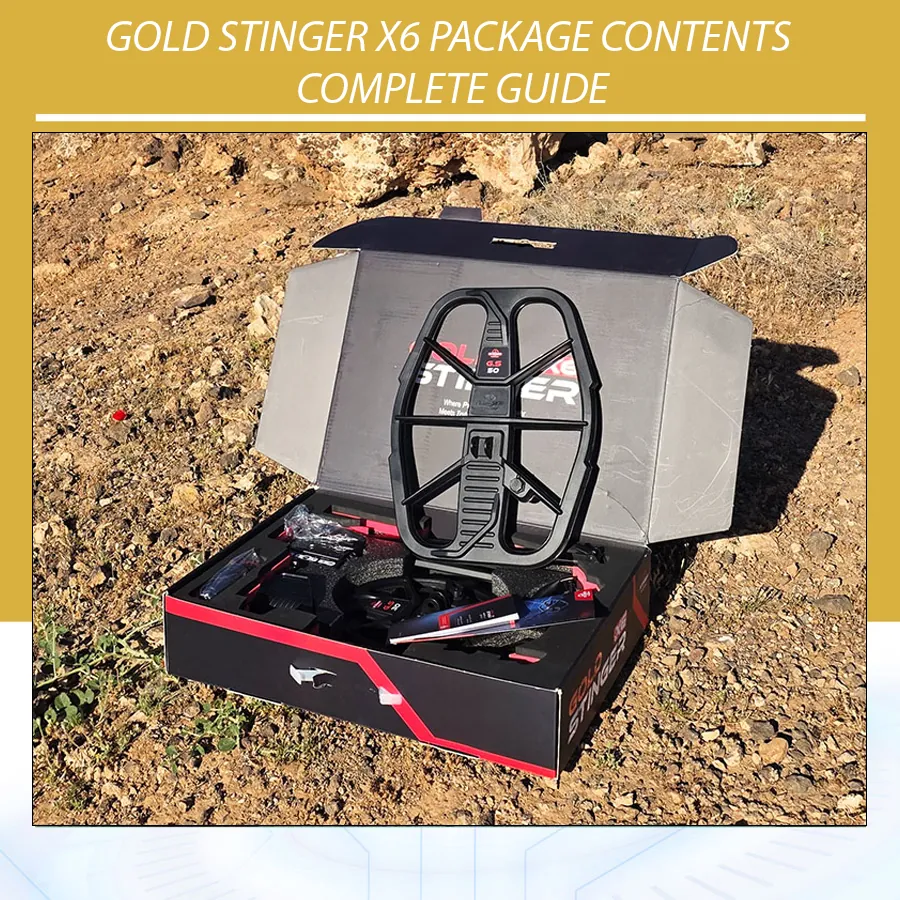
Gold Stinger X6 Package Contents Checklist
The manual identifies thirteen package components. Some are major operating parts; others protect comfort, power and connectivity. Packaging presentation can vary by distributor or shipment, so the supplied invoice and current product listing should be checked alongside the manual.
| # | Component | Main purpose | First inspection |
|---|---|---|---|
| 1 | Control box unit | Display, processing, controls and connections | Check screen, keypad, ports, housing and serial details |
| 2 | Upper shaft | Supports control box and handle | Check mounting points and locking mechanism |
| 3 | Middle shaft | Connects upper and lower sections | Confirm straightness and smooth fit |
| 4 | Lower shaft | Connects shaft assembly to search coil | Inspect coil-mounting end and adjustment holes |
| 5 | GS50 search coil | Wider coverage and larger/deeper-target priority | Inspect coil shell, ears, connector and cable |
| 6 | GS30 search coil | Small-target work and maneuverability | Inspect shell, ears, connector and cable |
| 7 | Coil connection cable | Connects coil signal path to control unit | Check pins, locking sections and strain relief |
| 8 | Arm strap | Stabilizes the detector during sweeping | Check stitching, fastener and adjustment |
| 9 | Coil mounting screw | Secures the coil to the lower shaft | Confirm screw, nut and any supplied washers |
| 10 | Headphones | Provides clearer private audio | Inspect plug, cable, ear pads and fit |
| 11 | Battery charger | Charges the internal power system | Confirm correct supplied charger and undamaged casing |
| 12 | Charging cable | Connects charger to Type-C charging jack | Check both ends and cable insulation |
| 13 | User manual | Provides assembly, setup and operating instructions | Keep an accessible field or digital copy |
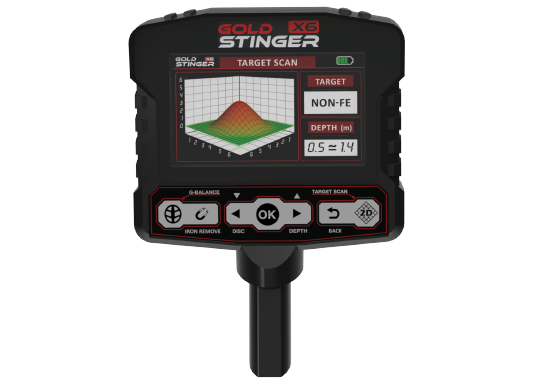
The Control Box Unit
The control box is the center of the Gold Stinger X6. It contains the display and keypad and provides the power switch, speaker, headphone jack, Type-C charging jack and coil-cable connection. Its software presents ground balance, search systems, settings, visual graphs and the status bar.
Inspect the display under normal light for cracks, pressure marks or protective-film bubbles that could hide damage. Press each keypad button gently to confirm normal movement. Check that ports are clean and that connector threads are not bent or cross-threaded. Do not insert tools into a port or apply liquid cleaner.
After assembly and startup, open the Information screen. The manual says it displays the product name, serial number, manufacturer and software version. Record these details for support and authenticity documentation. If the information is missing or inconsistent with the packaging, contact the seller before field use.
Upper, Middle and Lower Shafts
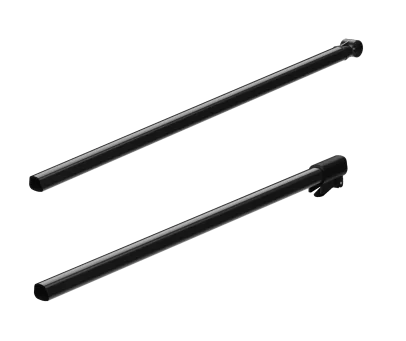
The three shaft sections create an adjustable structure between the operator and coil. Correct length allows the coil to remain parallel to the ground without bending the wrist or leaning the body. A detector that is too long increases shoulder strain; one that is too short encourages the coil to lift at the end of each sweep.
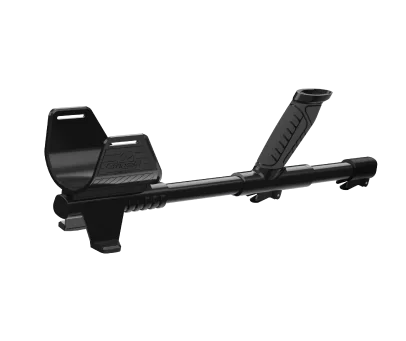
Lay the three pieces on a flat surface and confirm that they are straight. Inspect locks, adjustment points and the control-box attachment. Insert sections in the order shown in the manual rather than testing random combinations. They should join firmly without impact or excessive force.
During final adjustment, stand normally with the arm relaxed. The coil should reach the ground with a slight bend at the elbow. Tighten only enough to prevent rotation. Recheck the locks after several practice sweeps because a shaft that slowly twists changes coil angle and target response.
GS50 Search Coil
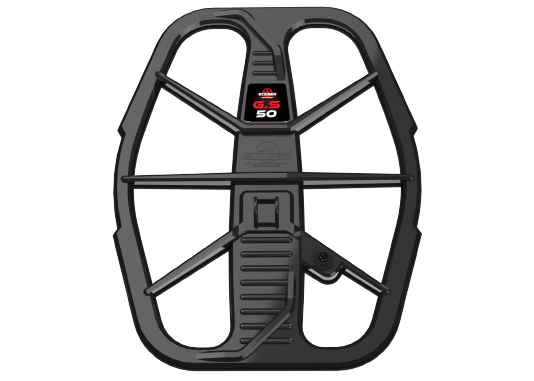
The GS50 is the larger supplied coil. The manual associates it with wider ground coverage and improved depth performance, making it the starting option for open areas and larger or deeper-target priorities. Those are manufacturer-stated design goals, not a guaranteed depth for every target.
A larger coil sees a larger volume of soil. That can improve coverage, but it can also combine several nearby targets and amplify ground variation. Inspect its outer shell, mounting ears, cable entry and full cable length. Small molding marks may be normal; cracks, exposed cable or loose parts are not.
Use GS50 when the search area is open, obstacles are limited and the objective favors broad coverage. Ground balance after installation and begin with conservative Sensitivity and Turbo values. Increase them only while the device remains stable.
GS30 Search Coil
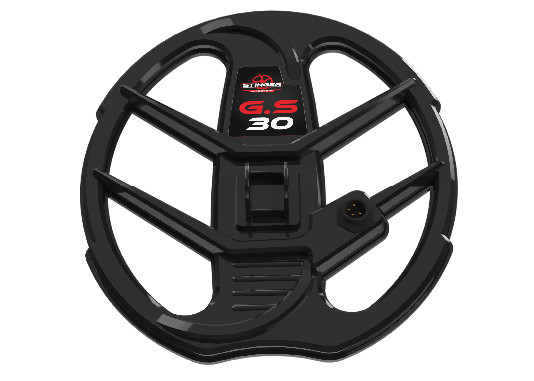
The GS30 is smaller and lighter. The manual describes it as offering enhanced sensitivity to small targets and better maneuverability in tight or cluttered environments. Its narrower detection footprint can help isolate responses that overlap under the larger coil.
GS30 is useful near bushes, rocks and uneven terrain, as well as in areas containing closely spaced metal. It generally requires more overlapping passes to cover the same area. Examine its mounting points and cable with the same care as the GS50.
Neither coil chemically identifies targets. Coil choice affects coverage, separation, ground volume and ergonomics. The dedicated Gold Stinger X6 GS30 vs GS50 guide explains the decision in detail.
Coil Connection Cable and Connectors
The connection path carries the coil signal to the control unit. The manual instructs the user to insert the connector into the coil base, secure the specified section clockwise, connect the other end to the device and secure its metal locking section.
Before connection, visually align the plug. If resistance appears immediately, stop and confirm orientation. Turning a misaligned connector can bend pins or damage threads. Hold the connector body rather than twisting the cable. Once connected, wrap the cable neatly around the shaft with no loose loops passing close to the coil.
| Good installation | Poor installation | Possible result |
|---|---|---|
| Even wraps with modest slack | Loose loops near the coil | Cable movement may create false responses |
| Connector aligned before tightening | Connector forced at an angle | Pin or thread damage |
| Slack left at pivot | Cable stretched across coil joint | Stress when changing coil angle |
| Cable secured without sharp bends | Tight kink around shaft | Internal conductor wear |
| Connector body used for removal | Cable pulled to disconnect | Strain-relief or wiring damage |
Arm Strap and Coil Mounting Hardware
The arm strap improves control and distributes detector weight. Thread it correctly through the armrest and adjust it so the forearm is supported without restricting circulation. A loose strap allows the detector to roll, while an excessively tight strap makes repositioning difficult.
The coil screw and nut secure the selected coil to the lower shaft while allowing angle adjustment. Confirm that any supplied washers or spacers are positioned as shown by the manufacturer. Tighten the hardware enough to hold the coil angle during a sweep, but do not crush the coil ears or use tools to apply excessive torque.
Carry the appropriate spare mounting hardware if it is available from the authorized supplier. Do not replace a lost non-metallic mounting part with an arbitrary metal bolt near the coil, because the replacement can affect balance or response.
Headphones
Headphones make weak changes easier to hear and reduce disturbance to other people. Inspect the AUX plug, cable and ear cushions. Begin with low detector volume, connect the headphones and increase the level to a comfortable point. Loud shallow targets should not be painful.
Audio is one layer of the Gold Stinger X6 response. Learn the tones in a controlled area using known ferrous and non-ferrous objects. Do not rely only on screen color, and do not increase volume to compensate for unstable Sensitivity or poor ground balance.
Keep non-waterproof headphones dry. Route the cable so it does not catch on the handle or enter the search-coil area. If audio cuts out, compare the speaker and headphones before assuming that the detector has a search-system problem.

Battery Charger and Charging Cable
The manual warns against using a charger other than the supplied unit. An incompatible charger can damage the battery or shorten its life. Check the charger casing, plug, cable insulation and Type-C connector before use. Do not charge a wet, overheated or visibly damaged device.
Charge in a dry, ventilated location away from direct sun and flammable material. Avoid sharply bending the charging cable at either end. Disconnect by holding the plug. The manual recommends charging the battery at least once per month during storage, even if the detector is not being used.
| Action | Why it matters |
|---|---|
| Use the supplied charger | Matches the intended charging system |
| Inspect charger and cable | Finds damaged insulation or connectors before power is applied |
| Allow a hot device to cool | Reduces stress on the battery |
| Charge in a dry place | Protects the control unit and power connection |
| Recharge monthly in storage | Follows the manual’s long-term battery recommendation |
| Store away from high heat | Heat can reduce battery life and damage electronics |
User Manual and Documentation
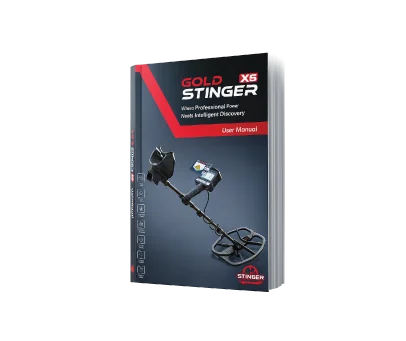
The manual is part of the operating system because it defines the correct connector sequence, ground-balance method, settings and mode interpretation. Keep the original safe and carry a digital or protected copy. Record the seller, purchase date, serial number and software version with the invoice.
Use the official Stinger Detectors videos to supplement the diagrams. The package lesson confirms the component set, while the assembly lesson shows how those components connect. The longer Gold Stinger X6 official guide explains how the assembled detector enters its search workflow.
How to Inspect a Newly Opened Gold Stinger X6
- Check the shipping box for impact, water or resealing evidence before discarding packaging.
- Lay out all thirteen listed components on a clean surface.
- Compare both coils and their connectors with the manual images.
- Inspect shaft pieces, locking mechanisms and coil hardware.
- Check the control box, screen, keypad, ports and power switch.
- Confirm that the supplied charger matches the shipment documentation.
- Assemble one coil carefully and verify that the cable reaches without tension.
- Start the detector and check the Information and coil-connectivity indicators.
- Test speaker and headphones at low volume.
- Ground balance outdoors before evaluating detection behavior.
Do not judge target performance indoors. Reinforced floors, wiring, appliances and surrounding metal can produce unstable results. The manual specifically advises avoiding indoor ground balance.
What to Do If a Component Is Missing or Damaged
Stop assembly if a structural part, connector or power accessory is damaged. Photograph the item and packaging and contact the authorized seller with the serial number and order information. Do not repair a new cable, open the control box or substitute a charger without written guidance.
If the package differs from the list because of a documented regional configuration, ask the seller to identify the variation. Keep communications and photos. A missing cosmetic accessory and a damaged signal connector do not carry the same risk; connectors, charging equipment, coil ears and control-box damage should be resolved before operation.
Preparing the Package for the First Field Trip
| Item | Pack it when | Preparation |
|---|---|---|
| Control box and assembled shaft | Every search | Charge and confirm settings |
| GS50 | Open-ground or larger-target survey | Inspect cable and mounting ears |
| GS30 | Small targets, clutter or confirmation | Pack protective support and hardware |
| Headphones | Noisy areas or faint-signal learning | Test audio before departure |
| Manual copy | Early training and troubleshooting | Save offline on a charged phone or print key pages |
| Approved charging equipment | Long trips | Protect from moisture and impacts |
| Coil hardware | Every search | Confirm correct screw, nut and washers |
Also carry site-appropriate safety equipment, drinking water, permissions and location tools. These are not detector package components, but they are essential to responsible fieldwork. Never use a general-purpose detector as proof that an excavation is free of utilities, unstable voids or hazardous military objects.
How the Package Components Work Together
The Gold Stinger X6 package contents form one connected system. The control box processes the signal from the installed coil. The shafts hold that coil at a stable height and angle. The cable carries the signal between coil and control box. The arm strap and headphones support consistent operator control and listening. The charger and cable maintain the power needed for a complete search session.
This relationship explains why a weak connection can resemble a detection problem. A loose cable, unstable coil angle or low battery can make an otherwise correct search mode seem unreliable. Before changing Discrimination, Sensitivity or Turbo, inspect the physical package components first.
| Component group | What it enables | What can go wrong if it is neglected |
|---|---|---|
| Coil and cable | Signal transmission from ground to control box | False signals, coil error or intermittent response |
| Shaft and coil hardware | Constant height and coil angle | Inconsistent sweep and changing ground response |
| Control box and keypad | Mode selection, settings and visual information | Incorrect system selection or unreadable field setup |
| Headphones and speaker | Audio interpretation | Missed weak tones or unsafe listening level |
| Charging equipment | Safe power management | Interrupted search or possible battery damage |
| Manual and video lessons | Correct sequence and interpretation | Improvised setup and avoidable errors |
First-Day Practice Plan
Do not make the first field day a search for maximum settings. Use it to learn what each package component changes. Start with GS30 in an open legal practice area. Assemble the detector, complete Ground Balance and sweep a few known metal objects placed on or legally buried in representative soil. Keep the coil height and sweep speed constant.
Next, repeat the test with GS50. Notice the wider field and difference in target footprint. Check headphones, speaker, display brightness and the coil-connectivity status. If a response changes while you touch or move the cable, stop and recheck its routing before continuing.
- Read the manual’s warnings and charge the detector.
- Lay out and inspect all Gold Stinger X6 package contents.
- Assemble GS30 and practice shaft length and coil angle.
- Verify startup, speaker and headphone audio.
- Ground balance on clean outdoor soil.
- Test one ferrous and one non-ferrous known target.
- Repeat with GS50 and record differences.
- Store the unused coil and hardware safely after the session.
When to Contact the Seller or Support
Contact the authorized seller before field use if the control box will not power on after approved charging, a supplied component is missing, a connector will not seat correctly, the coil shell or ears are cracked, or the status bar repeatedly reports a coil error after correct reconnection. Provide the purchase record, serial number, clear photographs and a short description of the test conditions.
Do not open sealed electronic components, modify a cable or substitute a different charger while seeking support. These actions can complicate diagnosis and may affect warranty coverage. Keep original packaging until the detector has been fully inspected and tested.
Component Care by Search Environment
| Environment | Main concern | Component care |
|---|---|---|
| Dry dusty field | Dust in connectors and controls | Keep ports closed when unused and brush dry dust away gently |
| Rocky terrain | Coil impacts and cable abrasion | Use controlled height and inspect coil shell after the session |
| Vegetation and brush | Cable snagging | Keep wraps secure and avoid pulling the detector by the cable |
| Hot weather | Battery and screen heat | Store out of direct sun and allow equipment to cool before charging |
| Wet or muddy ground | Moisture around electronics | Follow the published water-use limits and dry components before storage |
Common Package and Setup Mistakes
- Discarding packaging before verifying all components and serial details.
- Forcing a connector that is not correctly aligned.
- Wrapping the coil cable too loosely or stretching it at the pivot.
- Overtightening the coil screw and stressing the mounting ears.
- Using an unapproved charger because its plug appears compatible.
- Testing target performance indoors before ground balance.
- Assuming GS50 is always better because it is larger.
- Using maximum volume, Sensitivity or Turbo during the first test.
- Failing to record serial number and software information.
Gold Stinger X6 Package Contents FAQ
How many components are listed in the manual?
The package page lists thirteen entries, including the control box, three shaft sections, two coils, accessories, charging equipment and manual.
Does the package include both GS30 and GS50?
The supplied manual lists both search coils. Confirm the exact sales configuration with the current product listing and invoice.
Which coil should be installed first?
GS50 is a practical starting choice for open coverage, while GS30 is preferable for small targets, clutter and easier maneuverability.
Can I use another Type-C charger?
The manual instructs users to use the supplied charger. Connector shape alone does not confirm electrical compatibility.
Why is the coil cable important?
It carries the coil signal. Poor alignment, loose loops, tension or damage can produce connection errors or unstable responses.
Are the supplied headphones required?
The detector has a speaker, but headphones can make subtle audio easier to hear and reduce disturbance.
What information should I record after startup?
Record model name, serial number, manufacturer and software version from the Information screen, along with purchase details.
What should I do with the original packaging?
Keep it until the package and operation have been verified. It may also help protect components during storage or service shipment.
Can I replace the coil screw with a metal bolt?
Use only the correct approved hardware. An arbitrary metal part near the coil may affect operation or damage the mounting ears.
How often should I charge the stored detector?
The manual recommends charging at least once per month even when the device is not in use.
Where can I learn the assembly sequence?
Use the supplied manual and the official Stinger Detectors assembly video linked in this guide.
What comes after the package check?
Assemble the device, verify coil connectivity, complete startup and perform ground balance outdoors before searching.
Conclusion
A careful Gold Stinger X6 package contents check is the first stage of accurate operation. The two coils give the detector different field priorities, while the shaft, cable and mounting parts determine whether those coils can move consistently. Charging equipment, headphones and documentation support reliable long-term use.
Once all components are verified, continue with the Gold Stinger X6 assembly guide, then use the Gold Stinger X6 complete guide to learn startup, ground balance and search systems.
Resources
- Gold Stinger X6 product page
- Official Package Contents video
- Official Device Assembly video
- Official Gold Stinger X6 Complete Guide
- Gold Stinger X6 User Manual, English edition supplied with the device.