
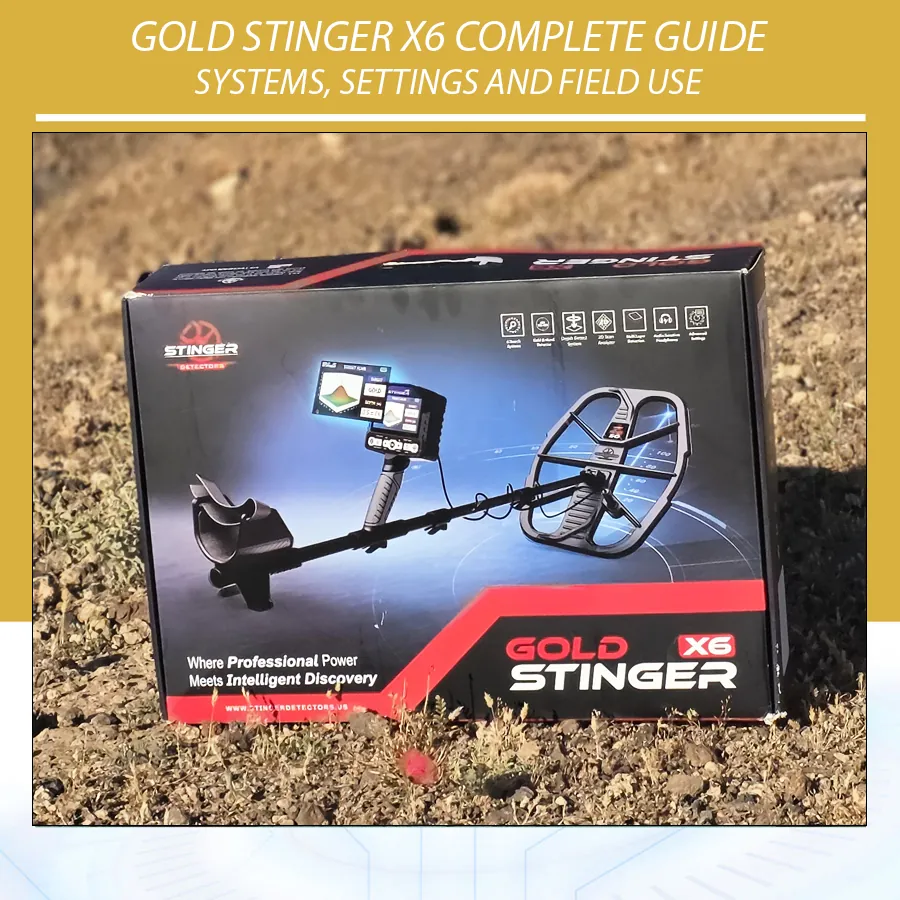
Gold Stinger X6 Overview
The Gold Stinger X6 is intended for users who want more than one type of response from a single detector. A broad search can begin in All Metals, a suspected response can be checked in Discrimination, its center can be refined with Pin Pointer, and its estimated size and depth can be evaluated with the relevant tools. Cavity Test and Target Scan provide additional visual workflows for specific questions.
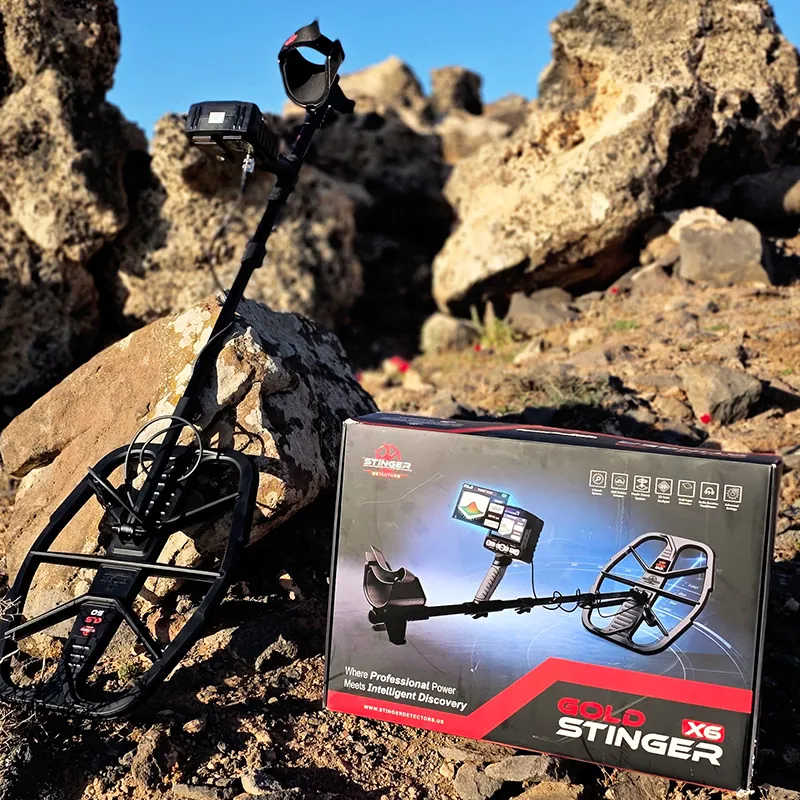
The product page presents the X6 as a six-system professional metal detector. The manual organizes the operating experience into Ground Balance plus several search and analysis screens. The exact count matters less than understanding the role of each function. Ground Balance prepares the detector for the soil. Search modes find or classify a response. Pinpoint and estimation tools are used after a repeatable response has already been established.
| Function | Main purpose | Best stage of the search | Important limitation |
|---|---|---|---|
| Ground Balance | Calibrates the detector to the soil response | Before searching and after ground changes | Must be performed over representative ground without a target |
| All Metals | Responds to ferrous and non-ferrous targets | Initial coverage and signal discovery | Also reports unwanted metal and difficult ground responses |
| Pin Pointer | Refines target center and displays numeric response | After a target has been confirmed | Nearby metal can pull the apparent center |
| Discrimination | Groups responses into target categories | Secondary target evaluation | Corroded, plated or mixed targets can be misclassified |
| Depth Detect | Calculates an approximate depth from entered target diameter | After marking signal boundaries | Accuracy depends on the estimated diameter and target conditions |
| Cavity Test | Displays cavity-oriented and mineral-ground graph responses | Checking a repeatable non-metallic ground anomaly | A graph is not proof of a room, tunnel or grave |
| Target Scan | Guides a scan and presents visual target analysis | Detailed check over a previously identified response | The result depends on following the movement correctly |
A useful introduction to the device is the official Gold Stinger X6 complete video guide. Use the video alongside this article and the manual rather than as a substitute for field practice.
Package Contents and Assembly
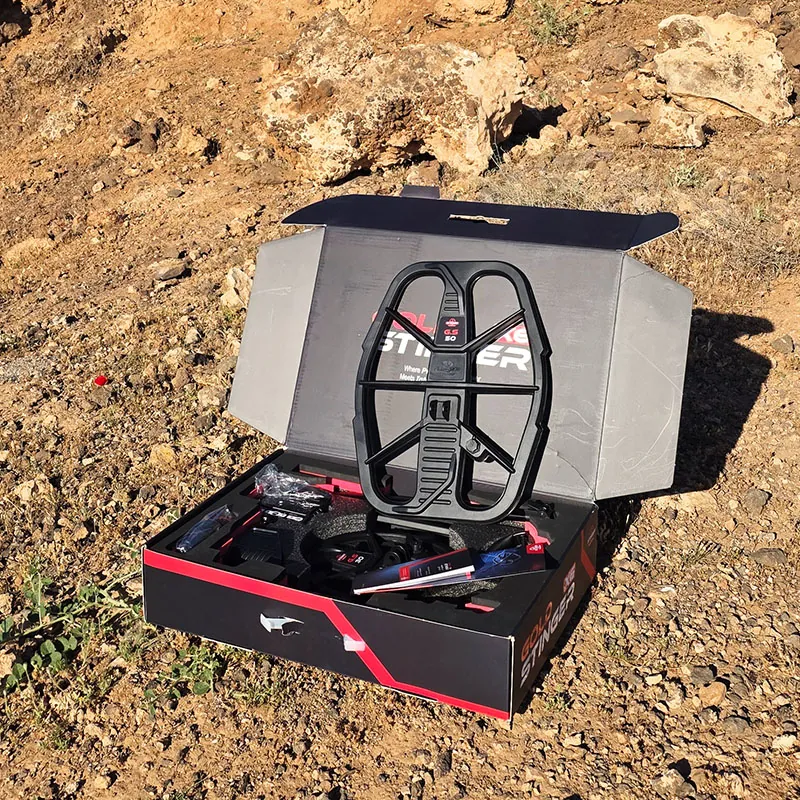
The manual lists a control box, upper, middle and lower shafts, GS50 and GS30 coils, coil connection cable, arm strap, coil mounting screw, headphones, battery charger, charging cable and user manual. Confirm all parts before assembly. Inspect connectors, cable strain relief, coil ears and mounting hardware for shipping damage.
The basic assembly sequence is straightforward:
- Attach the control box to the upper shaft and secure it with the specified screw.
- Insert the middle shaft into the upper shaft.
- Insert the lower shaft into the middle shaft and adjust the length for a relaxed posture.
- Attach either the GS30 or GS50 coil to the lower shaft using the supplied screw and nut.
- Connect the coil cable to the coil base and secure the connector as shown in the manual.
- Wrap the cable neatly around the shaft without pulling it tight or leaving loose loops.
- Connect the cable to the control unit and secure the metal connector section.
- Fit the arm strap and confirm that the coil can remain level without excessive wrist effort.
Do not force a connector or rotate the cable itself. Align the connector correctly, turn only the specified locking section and leave enough cable near the coil joint for normal angle adjustment. A loose cable can move within the coil field and create false responses; an overtight cable can stress the connector during sweeping.
The official lessons show the Gold Stinger X6 package contents and the complete device assembly procedure.
GS30 vs GS50: Choosing the Correct Coil
The Gold Stinger X6 includes two interchangeable coils because one coil cannot optimize every target and site. The GS50 is the larger option. According to the manual, it is intended to provide wider ground coverage and improved response to larger or deeper targets in open areas. The GS30 is smaller and lighter, with better maneuverability and sensitivity to small targets in confined or cluttered ground.
| Factor | GS30 coil | GS50 coil |
|---|---|---|
| Ground coverage | Narrower coverage per sweep | Wider coverage per sweep |
| Small targets | Preferred starting option | May be less precise around tiny or crowded targets |
| Target separation | Better in clutter and near obstacles | More targets and soil can enter the field together |
| Open-field searching | More passes required | Efficient for broad initial coverage |
| Large or deep targets | Useful for confirmation and tighter localization | Manufacturer-recommended option for greater depth and coverage |
| Weight and maneuverability | Lighter and easier in restricted areas | Larger swing footprint |
Choose the coil before ground balancing. After changing coils, switch the detector off if the manual’s procedure requires it, reconnect carefully, restart, verify the coil status and perform ground balance again. Settings that were stable with the GS30 may be noisy with the GS50 because the larger coil sees more ground and environmental signal.
Control Box, Keypad and Device Startup
The control box includes the display, keypad, speaker, headphone jack, Type-C charging jack, coil cable connector and rear power switch. The keypad provides dedicated access to Ground Balance, Iron Remove and Target Scan, plus left and right arrows, OK/Enter and Back.
| Control | Function | Field use |
|---|---|---|
| Ground Balance key | Opens the calibration screen | Use before scanning and when soil behavior changes |
| Iron Remove shortcut | Toggles iron filtering | Compare accepted and filtered responses |
| Left/Right arrows | Navigate and change values | Adjust settings and input target diameter |
| OK/Enter | Confirms choices and starts functions | Also used for Pin Pointer behavior described in the manual |
| Back | Returns to the previous screen | Exit a function without losing field orientation |
| Target Scan shortcut | Opens the guided scanning system | Use over a marked, confirmed response |
After assembly and coil selection, turn on the device using the rear power switch. Allow the startup progress to finish. The manual states that the Ground Balance screen appears first, emphasizing that calibration is part of startup rather than an optional correction after problems occur. The official Gold Stinger X6 startup video demonstrates this sequence.
How to Ground Balance the Gold Stinger X6
Ground balance helps the detector establish a reference for the mineral content of the soil. An incorrect reference can produce false signals and misleading discrimination. The manual recommends performing the first balance after a factory reset and correct coil installation.
- Move outdoors to a representative area away from obvious electrical interference.
- Choose ground that does not contain a localized metal signal.
- Confirm that the selected coil is connected and recognized.
- Open Ground Balance and follow the manual’s coil-loading and calibration procedure.
- Maintain approximately 5–10 cm between the coil and ground while moving it smoothly as instructed.
- Continue until the displayed value stabilizes and the confirmation tone or green OK message appears.
- If Not OK appears, move to another clean patch, reduce sensitivity in difficult ground and repeat.
Avoid balancing indoors, over reinforced concrete or beside large metal. Heavy mineralization or magnetic interference may require lower sensitivity before calibration. Repeat the procedure when changing coils, moving to a visibly different soil type, crossing from dry to wet ground or noticing that normal coil movement creates broad unstable responses.
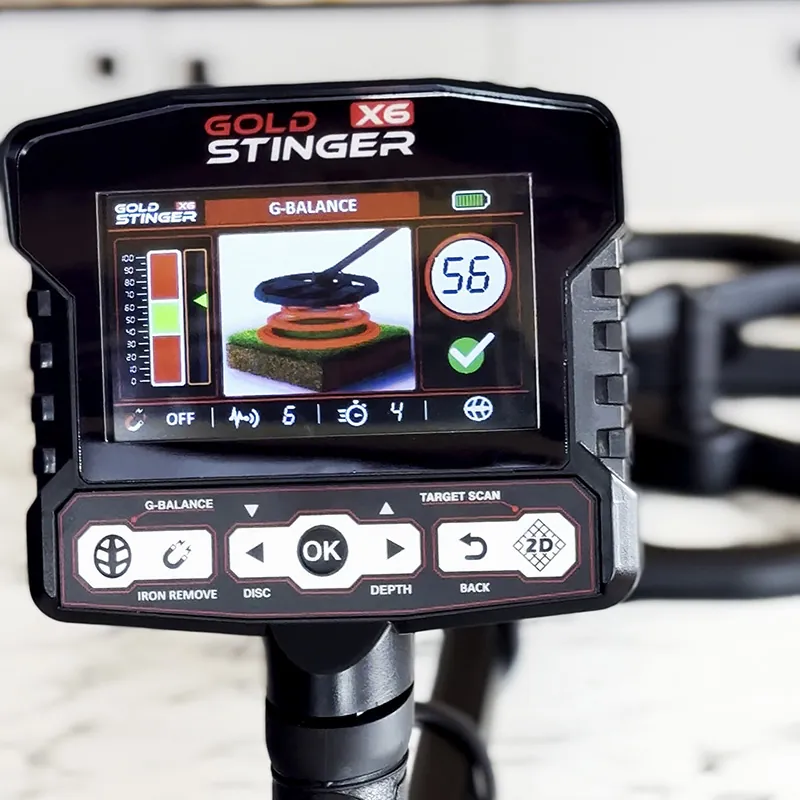
Ground balance does not identify the target and does not remove every hot rock. Its purpose is to reduce the normal soil response enough that localized changes become easier to evaluate. Read the detailed metal detector ground balance guide for the general principles behind calibration.
Gold Stinger X6 Search Systems Explained
All Metals Mode
All Metals is the logical starting system for broad coverage because it accepts ferrous and non-ferrous responses. The screen displays a numeric value, a real-time value bar and a linear graph. The manual describes red graph behavior for metal and blue behavior for a cavity or hollow-space response.
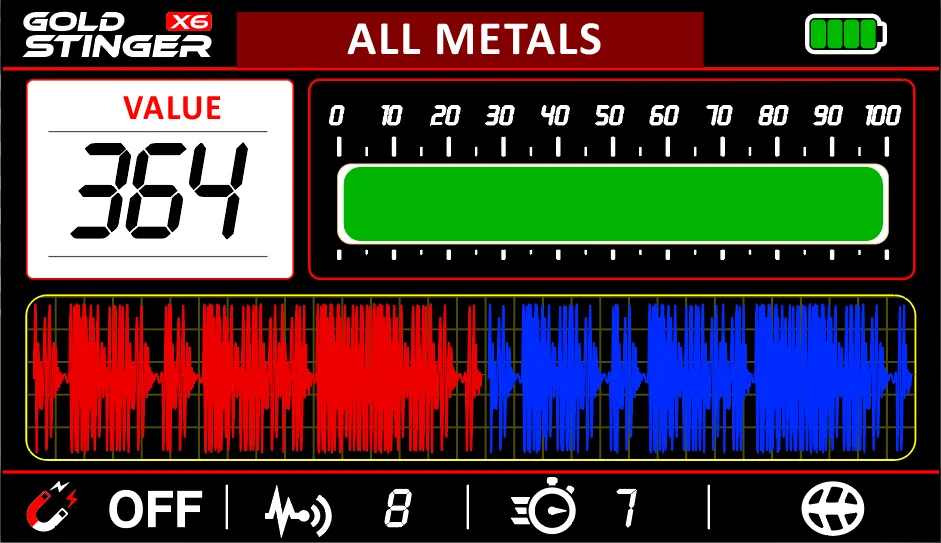
Use smooth overlapping sweeps with the coil level and a few centimeters above the ground. When a response occurs, stop walking and shorten the sweep. Cross the position from approximately 90 degrees. A real target should relate to a repeatable area, although orientation and nearby metal can make one direction stronger.
All Metals provides information, not automatic excavation advice. It will report nails, wire, foil and other unwanted objects. It is also a useful comparison mode when discrimination produces an uncertain or clipped tone. Watch the official All Metals system lesson.
Pin Pointer System
Pin Pointer is used after another system has found a repeatable response. The audio becomes strongest as the coil approaches the target center, while numeric values change with signal strength and settings. The manual describes several Pin Pointer behaviors: a metal-oriented mode, a cavity-oriented mode and a combined P-Point function entered by holding OK.
The manual associates numeric ranges with non-precious, gold and precious-metal categories. Treat these ranges as device-specific indications rather than chemical identification. Target size and distance affect the number, and oxidized sheet metal, lead, tin or plated objects can resemble a valuable response.
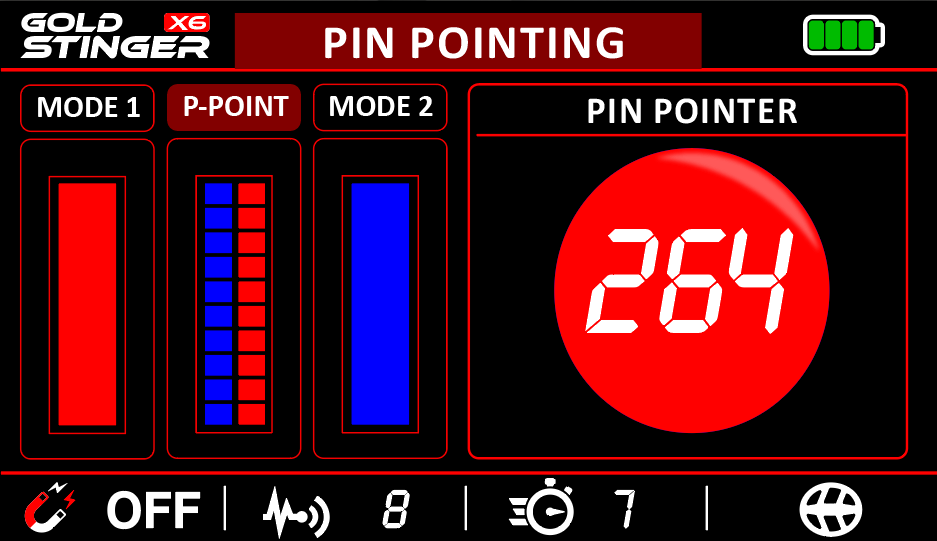
Mark the center from two directions before switching systems. If the Pin Pointer center moves significantly, return to All Metals and check for more than one object or an elongated target. See the official Pin-Pointer system video and the broader metal detector pinpointing guide.
Discrimination Mode
Discrimination groups responses into gold, other precious metals and non-precious or ferrous categories using distinctive sounds and colored graphs. It is useful after initial discovery, particularly where unwanted iron is common. It should not replace an open-mode check.
The manual explicitly warns that corroded steel, chrome-plated material and incorrect ground balance can produce misleading results. Deep targets and adjacent metals can also blend. Recheck a promising response in All Metals, sweep from multiple directions and compare the signal footprint before deciding what the display means.
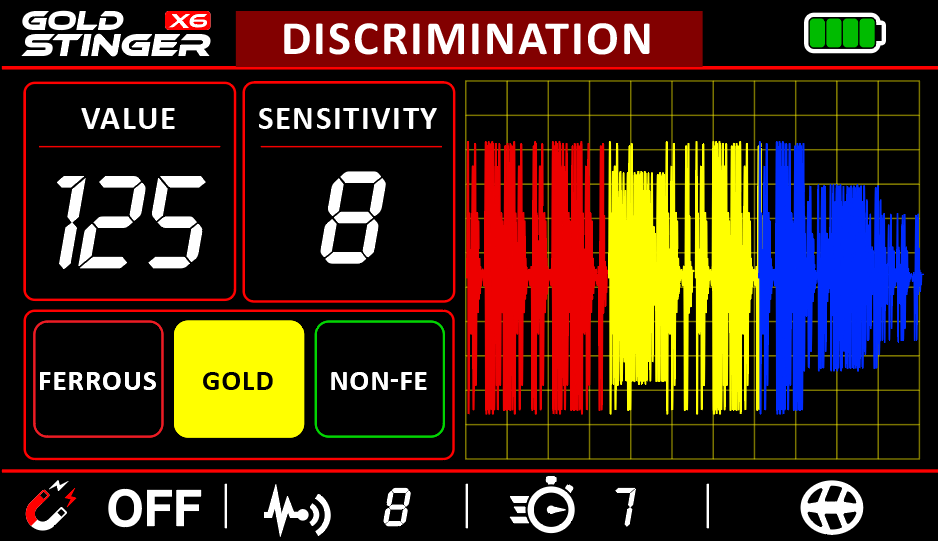
The manual describes yellow graph behavior for a gold-oriented indication and green for other precious metals. These are classifications made by the device’s signal processing. The only certain identification occurs after legal recovery and physical examination. The official lesson is Gold Stinger X6 Discrimination.
Depth Detect
Depth Detect estimates depth after the user defines the response boundaries and enters an estimated target diameter. First identify the beginning and end of the signal on one axis. Repeat from the opposite direction to outline a square or rectangle. Estimate the diameter of that area, enter it with the arrow keys and press Enter to calculate the displayed depth.
The estimate depends heavily on the diameter input. A large iron sheet, a cluster of objects or mineralized patch can create a broad footprint that does not represent one compact target. Confirm the center and boundaries with repeated passes before entering the value. Use the estimate for planning, not as a guaranteed measurement.
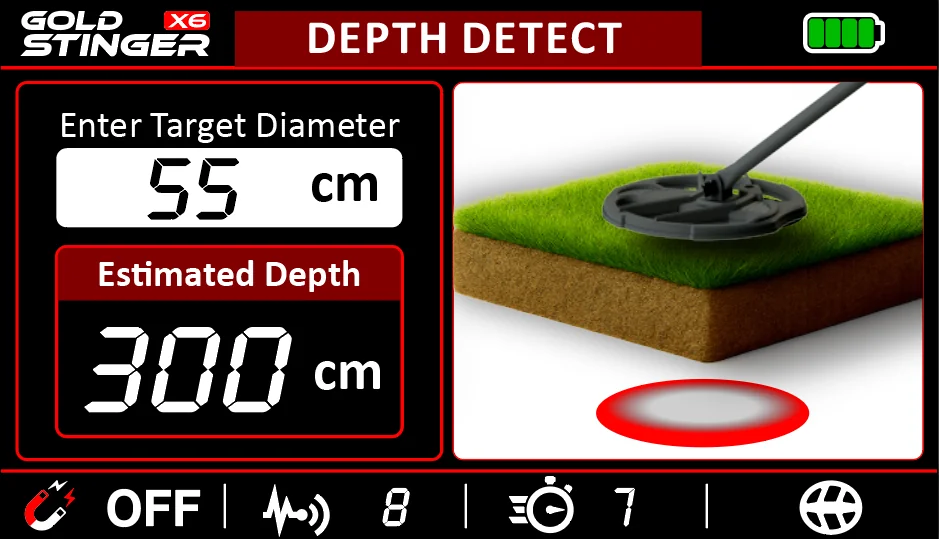
See the official Depth Detect video for the interface sequence.
Cavity Test
Cavity Test is intended to show responses associated with gaps or lower-density areas and to distinguish them from mineral-rich ground. The manual describes blue 2D graph behavior for a cavity-oriented response and brown for mineral soil, without an audio tone.
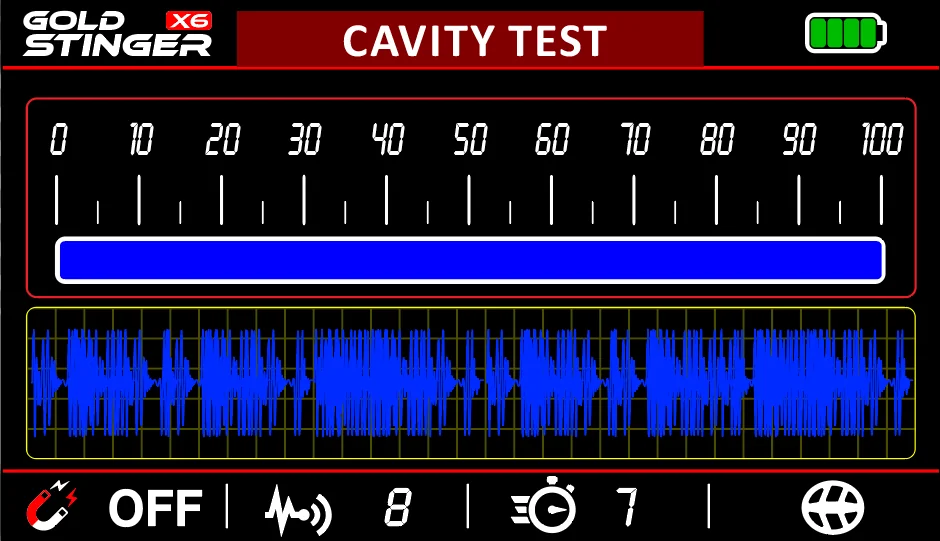
A colored graph cannot by itself prove an underground room, tunnel, basement or grave. Moisture changes, loose fill, disturbed soil, rocks, operator movement and site geometry can influence the response. Repeat parallel passes, reverse direction and check whether the anomaly remains in the same boundaries. Never enter or excavate a suspected void without permission and professional safety assessment.
The official visual lesson is Gold Stinger X6 Cavity Test.
Target Scan
Target Scan is a guided analysis workflow. Select the system and press OK. The first screen demonstrates how the coil should move. The operator must reproduce that movement over the marked target and stop when the animation ends. The following screen presents the analysis as a visual graph.
According to the manual, a metal response is displayed in red, the Target section reports a ferrous or non-ferrous interpretation, and the Depth section presents an approximate depth. Graph height varies with target size and distance. Because the system depends on controlled movement, inconsistent speed, height or scan path can change the result.
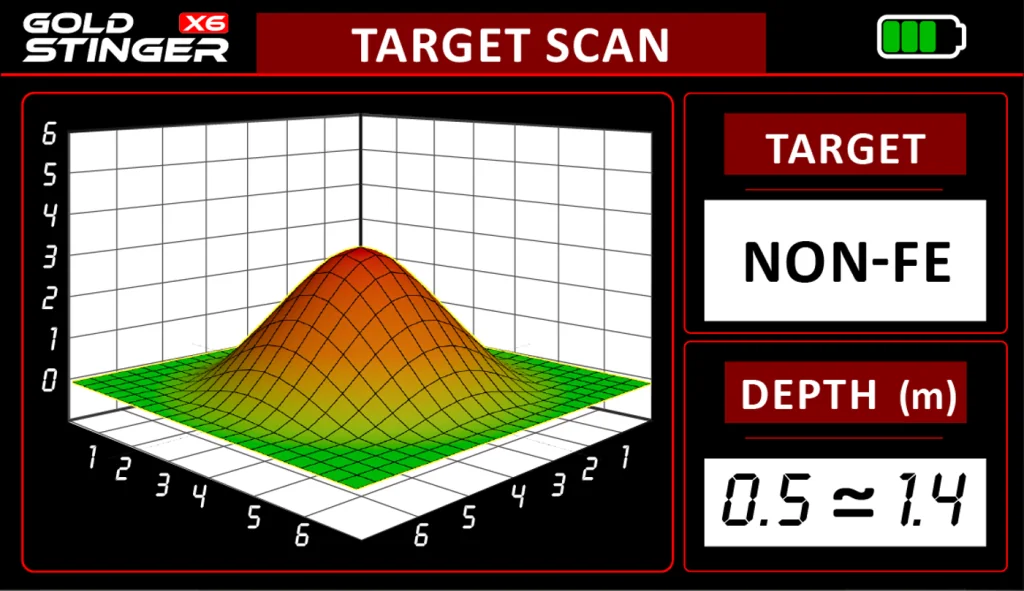
Use Target Scan after All Metals and cross-sweeps have established a repeatable position. If the visual result conflicts with the original audio location, return to the earlier system and check for multiple targets. Watch the official Target Scan lesson.
Sensitivity, Turbo, Iron Remove and Other Settings
Sensitivity
Sensitivity is adjustable from 0 to 100 according to the manual. Higher values increase responsiveness but can also amplify mineralization, electromagnetic interference and unstable ground. Use the highest setting that remains stable during a normal sweep. If balancing fails or random tones appear everywhere, reduce sensitivity before increasing filtering.
Turbo
Turbo is also presented as a 0–100 control. The manual describes it as a power boost that may enhance signal strength and depth, while higher levels consume more battery and may add noise in difficult soil. Establish a stable baseline first. Increase Turbo in small steps over a repeatable test target and confirm that the result improves from more than one direction.
Iron Remove
Iron Remove filters iron-oriented responses when enabled. This can reduce clutter, but strong rejection may hide a desirable target close to iron or convert a mixed response into a broken tone. Compare doubtful signals with Iron Remove off before leaving them.
Volume, Brightness and Language
Volume and brightness range from 0 to 100. Set volume for safe, comfortable listening and brightness for visibility rather than maximum output. Lower brightness can conserve energy. The Language menu changes the interface language, while the Information screen displays product name, serial number, manufacturer and software version for support and documentation.
Reset and Status Bar
Factory Reset erases customized settings and requires confirmation. Record important values before using it. The status bar shows Iron Remove status, current sensitivity, Turbo level and coil connectivity. A disconnected or error indication should be resolved before searching: power down, inspect the cable and connectors, reconnect correctly and restart.
| Condition | Sensitivity | Turbo | Iron Remove | Reason |
|---|---|---|---|---|
| Clean, mild open ground | Increase to highest stable value | Test gradually | Off for initial survey | Preserves broad target information |
| Mineralized or noisy soil | Reduce until stable | Low to moderate | Compare on and off | Stability is more useful than maximum numbers |
| Iron-contaminated site | Moderate | Only if stable | On for comparison, off for doubtful signals | Reduces clutter without relying on rejection alone |
| Small-target search with GS30 | Raise carefully | Use only if response improves | Site-dependent | Small targets require clarity, not random noise |
| Large-target survey with GS50 | Stable site value | Test over representative target | Off initially | Larger coil already sees more ground |
A Complete Gold Stinger X6 Field Workflow
- Confirm permission and safety. Verify landowner approval and local rules. Avoid utilities, protected sites, unstable excavations and suspected hazardous objects.
- Choose the coil. Use GS50 for open coverage and larger-target priorities; choose GS30 for small targets, clutter and restricted spaces.
- Inspect and assemble. Secure the coil, cable, shafts and control box without stressing connectors.
- Power on and check status. Let startup finish and confirm coil connectivity and battery condition.
- Establish conservative settings. Begin below maximum sensitivity and Turbo.
- Ground balance. Use clean representative soil and repeat if Not OK appears.
- Survey in All Metals. Keep the coil parallel, approximately 5–10 cm above the ground, with smooth overlapping sweeps.
- Confirm the response. Stop walking, shorten the sweep and cross from a second direction.
- Mark the center and boundaries. Do this before changing systems.
- Compare systems. Use Discrimination for category clues and Pin Pointer for location.
- Estimate only after confirmation. Use Depth Detect or Target Scan after defining the target footprint.
- Document the result. Record coil, settings, balance value, mode behavior and site conditions.
Move slowly enough for the graph and audio to develop. Overlap each sweep so no strips are missed. Lifting the coil at the end of the arc reduces consistency and can create ground responses. When a signal is found, use shorter passes rather than swinging faster.
Troubleshooting Common Gold Stinger X6 Problems
| Symptom | Possible cause | What to do |
|---|---|---|
| Ground Balance shows Not OK | Metal below coil, mineralized ground, high sensitivity or poor motion | Move to clean soil, lower sensitivity and repeat smoothly |
| Random signals everywhere | EMI, loose cable, excessive sensitivity/Turbo or ground response | Inspect cable, move from interference, rebalance and reduce settings |
| Coil error or disconnected status | Loose or incorrectly secured connector | Power off, inspect, reconnect and restart |
| Gold indication on obvious trash | Oxidized, plated, lead, tin or mixed target | Cross-check in All Metals and Discrimination from multiple directions |
| Depth estimate changes widely | Incorrect target diameter or multiple objects | Remark boundaries and verify the target footprint |
| Cavity graph is not repeatable | Inconsistent path, height, soil or operator movement | Repeat aligned passes in both directions |
| Weak or unstable target | Coil too high, sweep too fast, wrong coil or difficult soil | Level the coil, slow down, test GS30 and stabilize settings |
Battery and Device Care
Use the supplied charger and protect the battery from high temperature. The manual recommends charging at least once per month during storage. Protect the display and control unit from water, heat, impacts and sudden shocks. The presence of a field search coil does not automatically mean that the complete control unit is waterproof; follow the stated product instructions.
Clean dry soil from the coil and shaft after use. Do not use aggressive chemicals or direct high-pressure water on the control box. Inspect the cable for cuts, sharp bends or stressed ends. Store the detector in a dry, temperature-controlled place with the coil cable relaxed.
Official Gold Stinger X6 Training Videos
| Lesson | Video link | Use it for |
|---|---|---|
| Complete Guide | Watch the full official guide | Full-device orientation |
| Introduction | Watch the introduction | Device purpose and overview |
| Package Contents | Watch package contents | Checking supplied components |
| Assembly | Watch device assembly | Shaft, coil and cable installation |
| Startup | Watch device startup | Power-on and initial screens |
| All Metals | Watch All Metals | Initial scanning |
| Pin Pointer | Watch Pin-Pointer | Target localization |
| Discrimination | Watch Discrimination | Target-category analysis |
| Depth Detect | Watch Depth Detect | Diameter input and depth estimate |
| Cavity Test | Watch Cavity Test | Void and mineral graph behavior |
| Target Scan | Watch Target Scan | Guided movement and visual analysis |
Frequently Asked Questions
What is the best system to start with?
Ground balance first, then begin broad searching in All Metals. Use Discrimination and Pin Pointer only after finding a repeatable response.
Should I use the GS30 or GS50 coil?
Use GS50 for wider coverage and larger or deeper-target priorities in open ground. Use GS30 for small targets, clutter, obstacles and tighter localization.
How high should the coil be above the ground?
The manual recommends approximately 5–10 cm for calibration and normal guided use. Keep the height consistent and the coil parallel.
Does a gold indication prove the target is gold?
No. It is the device’s interpretation of the signal. Corroded, plated, lead, tin and mixed targets may resemble valuable metals.
How accurate is the Depth Detect result?
It is an estimate based partly on the diameter entered by the user. Target shape, multiple objects, soil and incorrect boundary marking can change it.
Can Cavity Test prove there is a tunnel?
No. It displays a cavity-oriented graph response. Repeatability and professional investigation are required before interpreting a subsurface structure.
When should I turn on Iron Remove?
Use it as a comparison in iron-contaminated ground. Recheck doubtful signals with Iron Remove off because valuable targets can be close to iron.
Should Sensitivity and Turbo be set to 100?
Not automatically. High values can increase noise and battery use. Choose the highest stable combination for the soil and coil.
Why does Ground Balance fail?
The coil may be over metal, the soil may be difficult, sensitivity may be too high or the coil movement may be inconsistent. Move, reduce sensitivity and repeat.
Do I need to ground balance after changing coils?
Yes. Verify the new coil connection and perform ground balance because the coil changes how the detector sees the soil.
Can I use the Gold Stinger X6 indoors?
Indoor metal, reinforcement and electrical interference can make calibration and interpretation unreliable. The manual advises against indoor ground balancing.
How often should the battery be charged during storage?
The manual recommends charging at least once per month, even when the detector is not in use.
Conclusion
The Gold Stinger X6 works best as a sequence rather than a collection of isolated screens. Select the proper coil, assemble it carefully, establish stable settings, ground balance, search in All Metals, confirm from multiple directions, and only then use classification, pinpointing, depth or visual-analysis tools. This workflow makes each system answer a specific question and reduces the risk of treating one uncertain response as a confirmed discovery.
The most productive settings are not always the highest settings. Controlled coil height, slow overlapping sweeps, repeatable cross-checks and accurate notes contribute more to reliable interpretation than chasing a maximum number. Learn the device over known targets and representative soil before making decisions in an unknown site.
Resources
- Orient Detectors: Gold Stinger X6 product page
- Gold Stinger X6 Search Systems Explained
- Stinger Detectors official YouTube videos
- Gold Stinger X6 Official Complete Guide
- Gold Stinger X6 User Manual, English edition supplied with the device.